Heywood-Wakefield Restoration

Yeah ok. I was warned. Newborndome is no joke. Midnight feedings… sleep deprivation… a bazillion dirty diapers. How have people been doing this for centuries?!? Jk. Baby H is totally worth the effort - even if I officially can’t have a cup of coffee in the morning without it going cold.

Caleb has been fabulously supportive. Even though he is back at work, he’s found ways to give me little breaks when he can like downtime to make a craigslist run or have a glass of wine on our deck.​ He even gave me a block of baby-free time to knock out a new piece:

A Heywood-Wakefield Airflow Dresser

FullSizeRender.jpg

I actually scored this dresser somewhere in my 3rd trimester (I think I might have played my last preggo card to convince Caleb to help me pick it up one morning before work) - ha!  It was obvious that the previous owner did not realize what a rare find they had considering they put it in their sticker-loving son’s room.  Just look at the damage to the signature H-W finish! 

FullSizeRender.jpg

The watermark on the back revealed that it’s a “wheat rub.” This means it was truly vintage and not a reproduction since newer H-W pieces sport their signature Amber finish.  This piece could date somewhere in the 1930’s-1950’s when Heywood-Wakefield art-deco-inspired mid-century modern style rose to popularity.  I debated long and hard about how I was going to tackle this project and eventually decided on:

IMG_0836.JPG

A restoration

I was seriously on the fence about restoring vs transforming.  After consulting my brother-in-law the wine-cellar-building-carpenter-and-fellow-vintage-furniture-lover I realized it would be practically criminal to alter it with paint or new hardware.

IMG_0826.JPG

First order of business to get it back to its former glory was to SAND THE HECK OUT IT.  Yeah that sticker residue had to go.

FullSizeRender.jpg

After the thorough sanding came a thorough waxing.

IMG_0828.JPG

The wax gives it a buttery finish that’s much closer to that trademark Heywood-Wakefield buff.

IMG_0835.JPG

This is actually not the first Heywood-Wakefield piece I’ve gotten on my hands on.  Some of you may remember this gimpy coffee table find from 2017 that I ended up keeping for myself.

 
Picture8b.jpg
 

Although a little patinaed, the coffee table had an original H-W “champagne finish” which, if you ask me, looks practically the same as the “wheat rub” on the Airflow dresser.  That could be due in part to the fact that all H-W pieces are made out of the same wood: northern yellow birch.

IMG_0827.JPG

Sealing the Airflow dresser in a wax allowed the natural golden tones of the northern yellow birch to shine.

IMG_0861.JPG

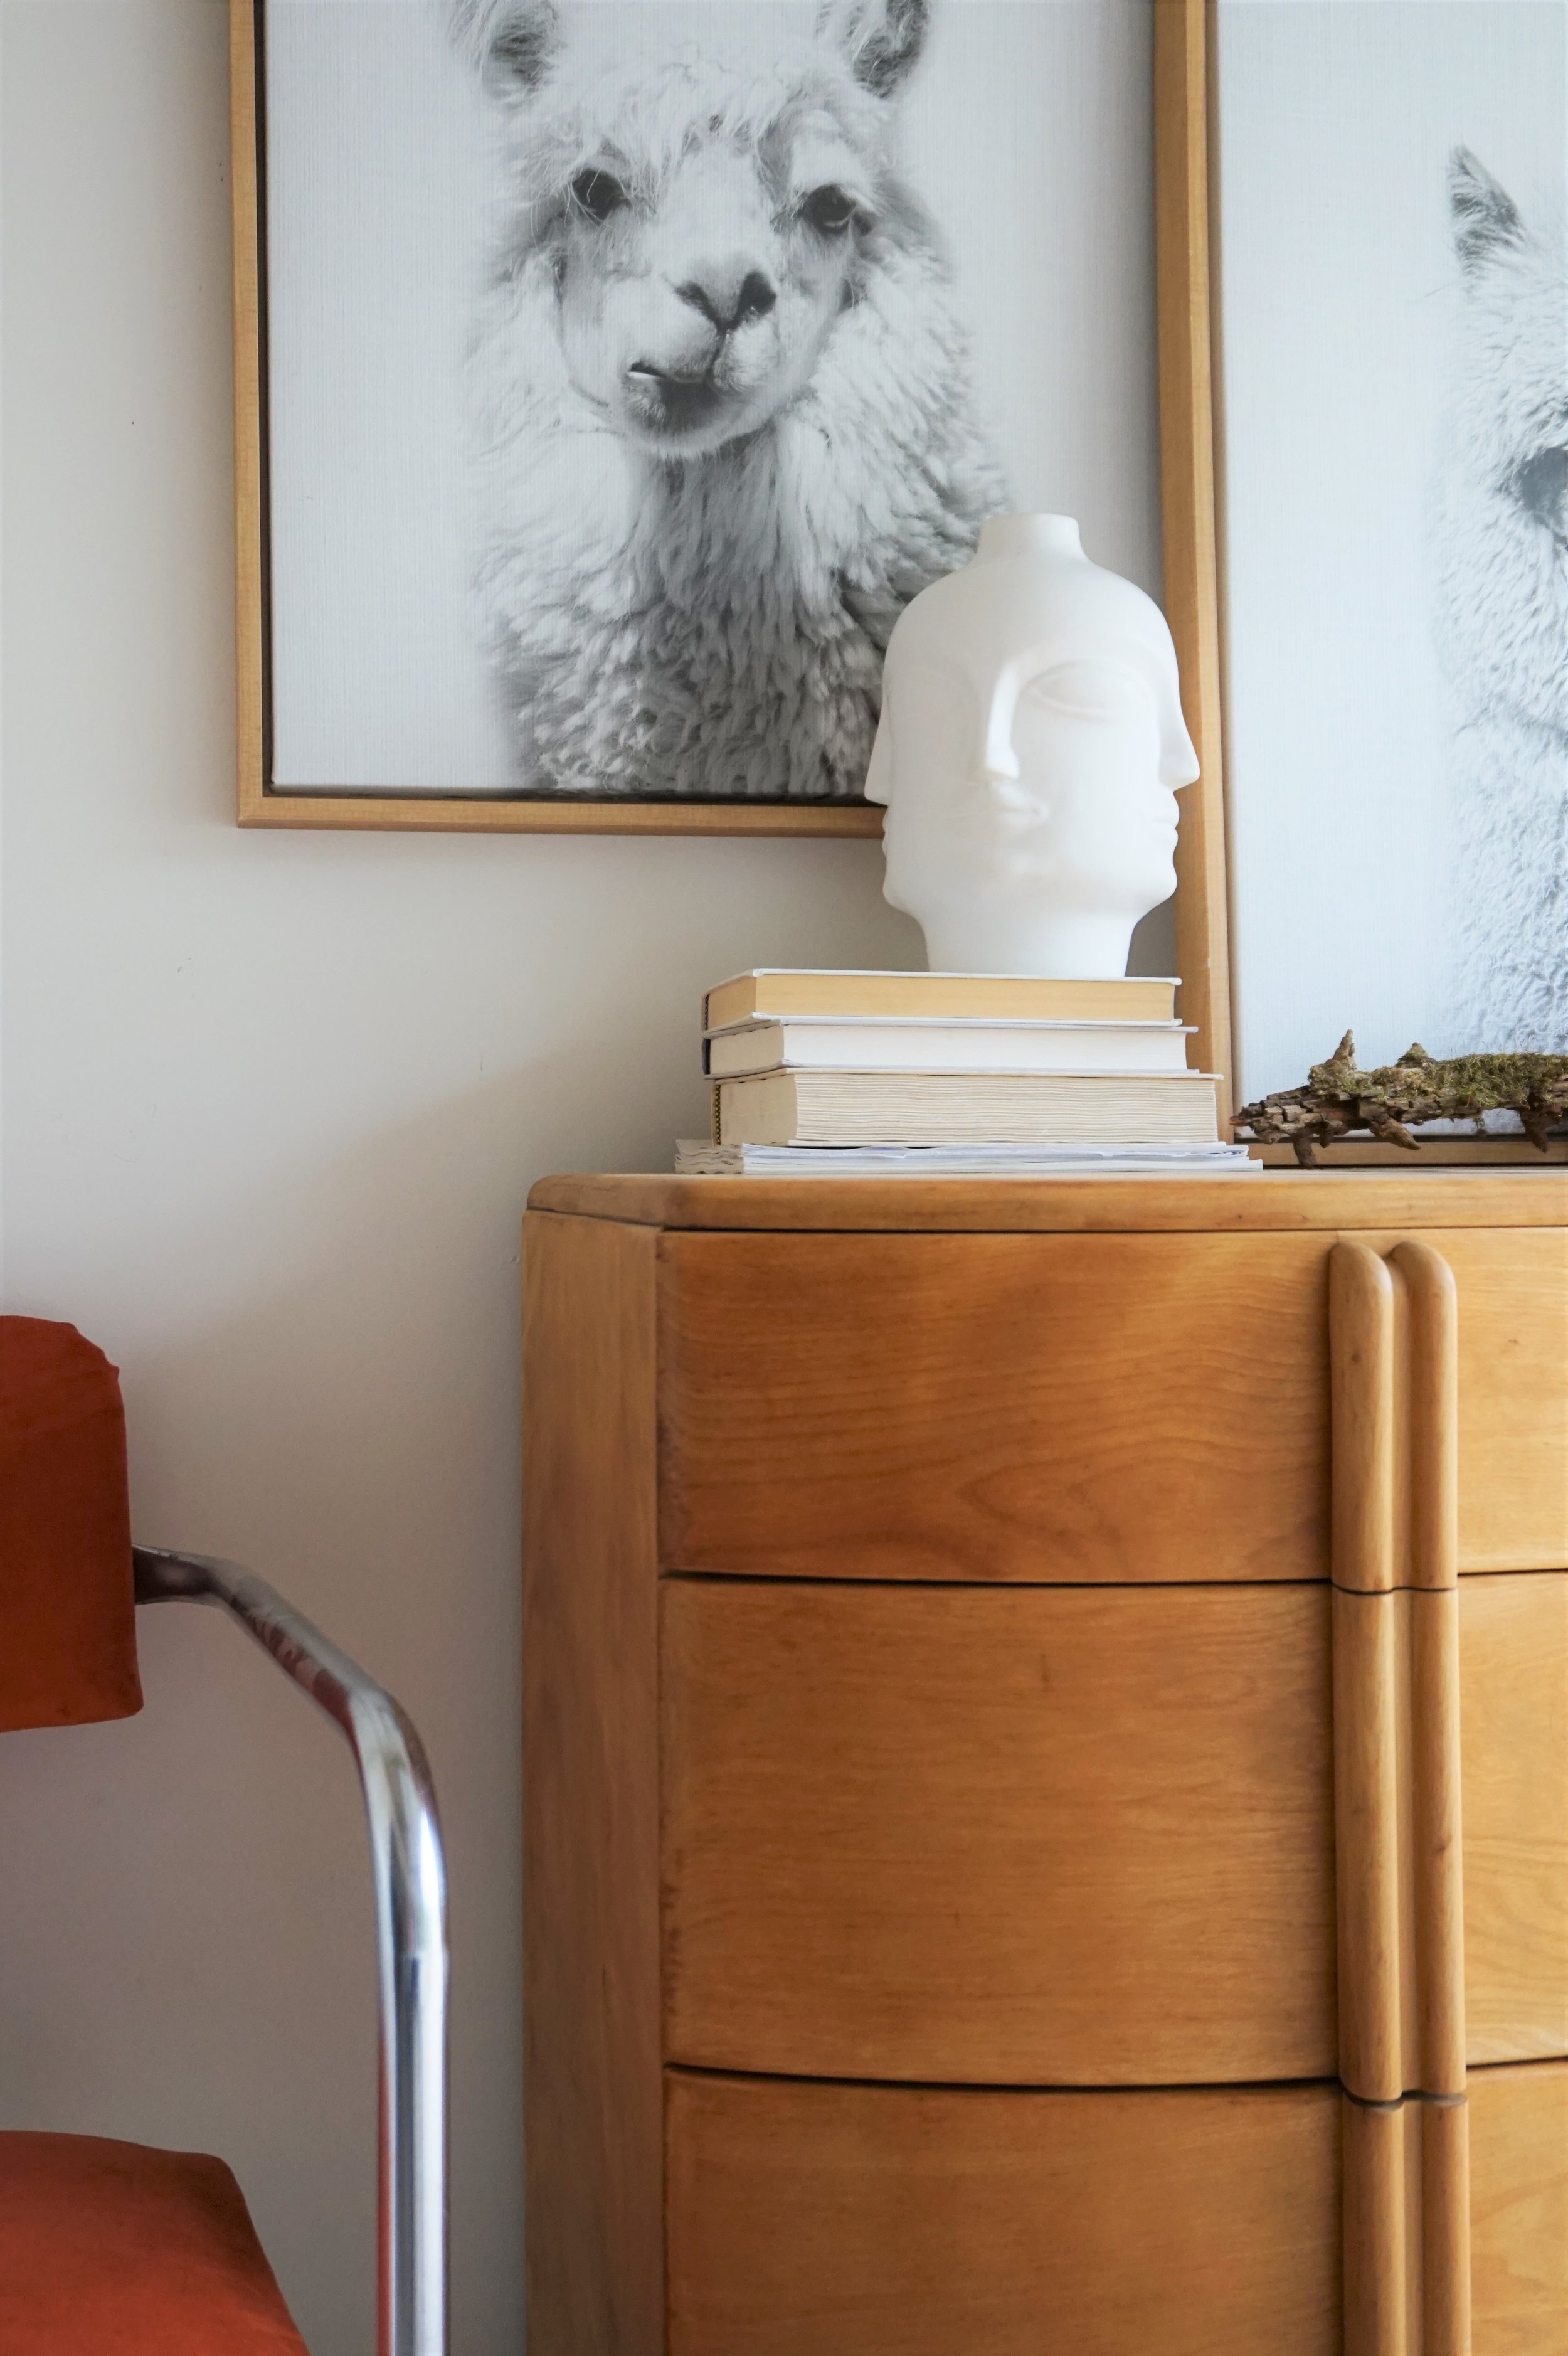
Besides the finish, another trademark feature of a H-W piece is the sculptural lines - like the unique curves in the drawer fronts and the architectural details in the handles.

IMG_0832.JPG

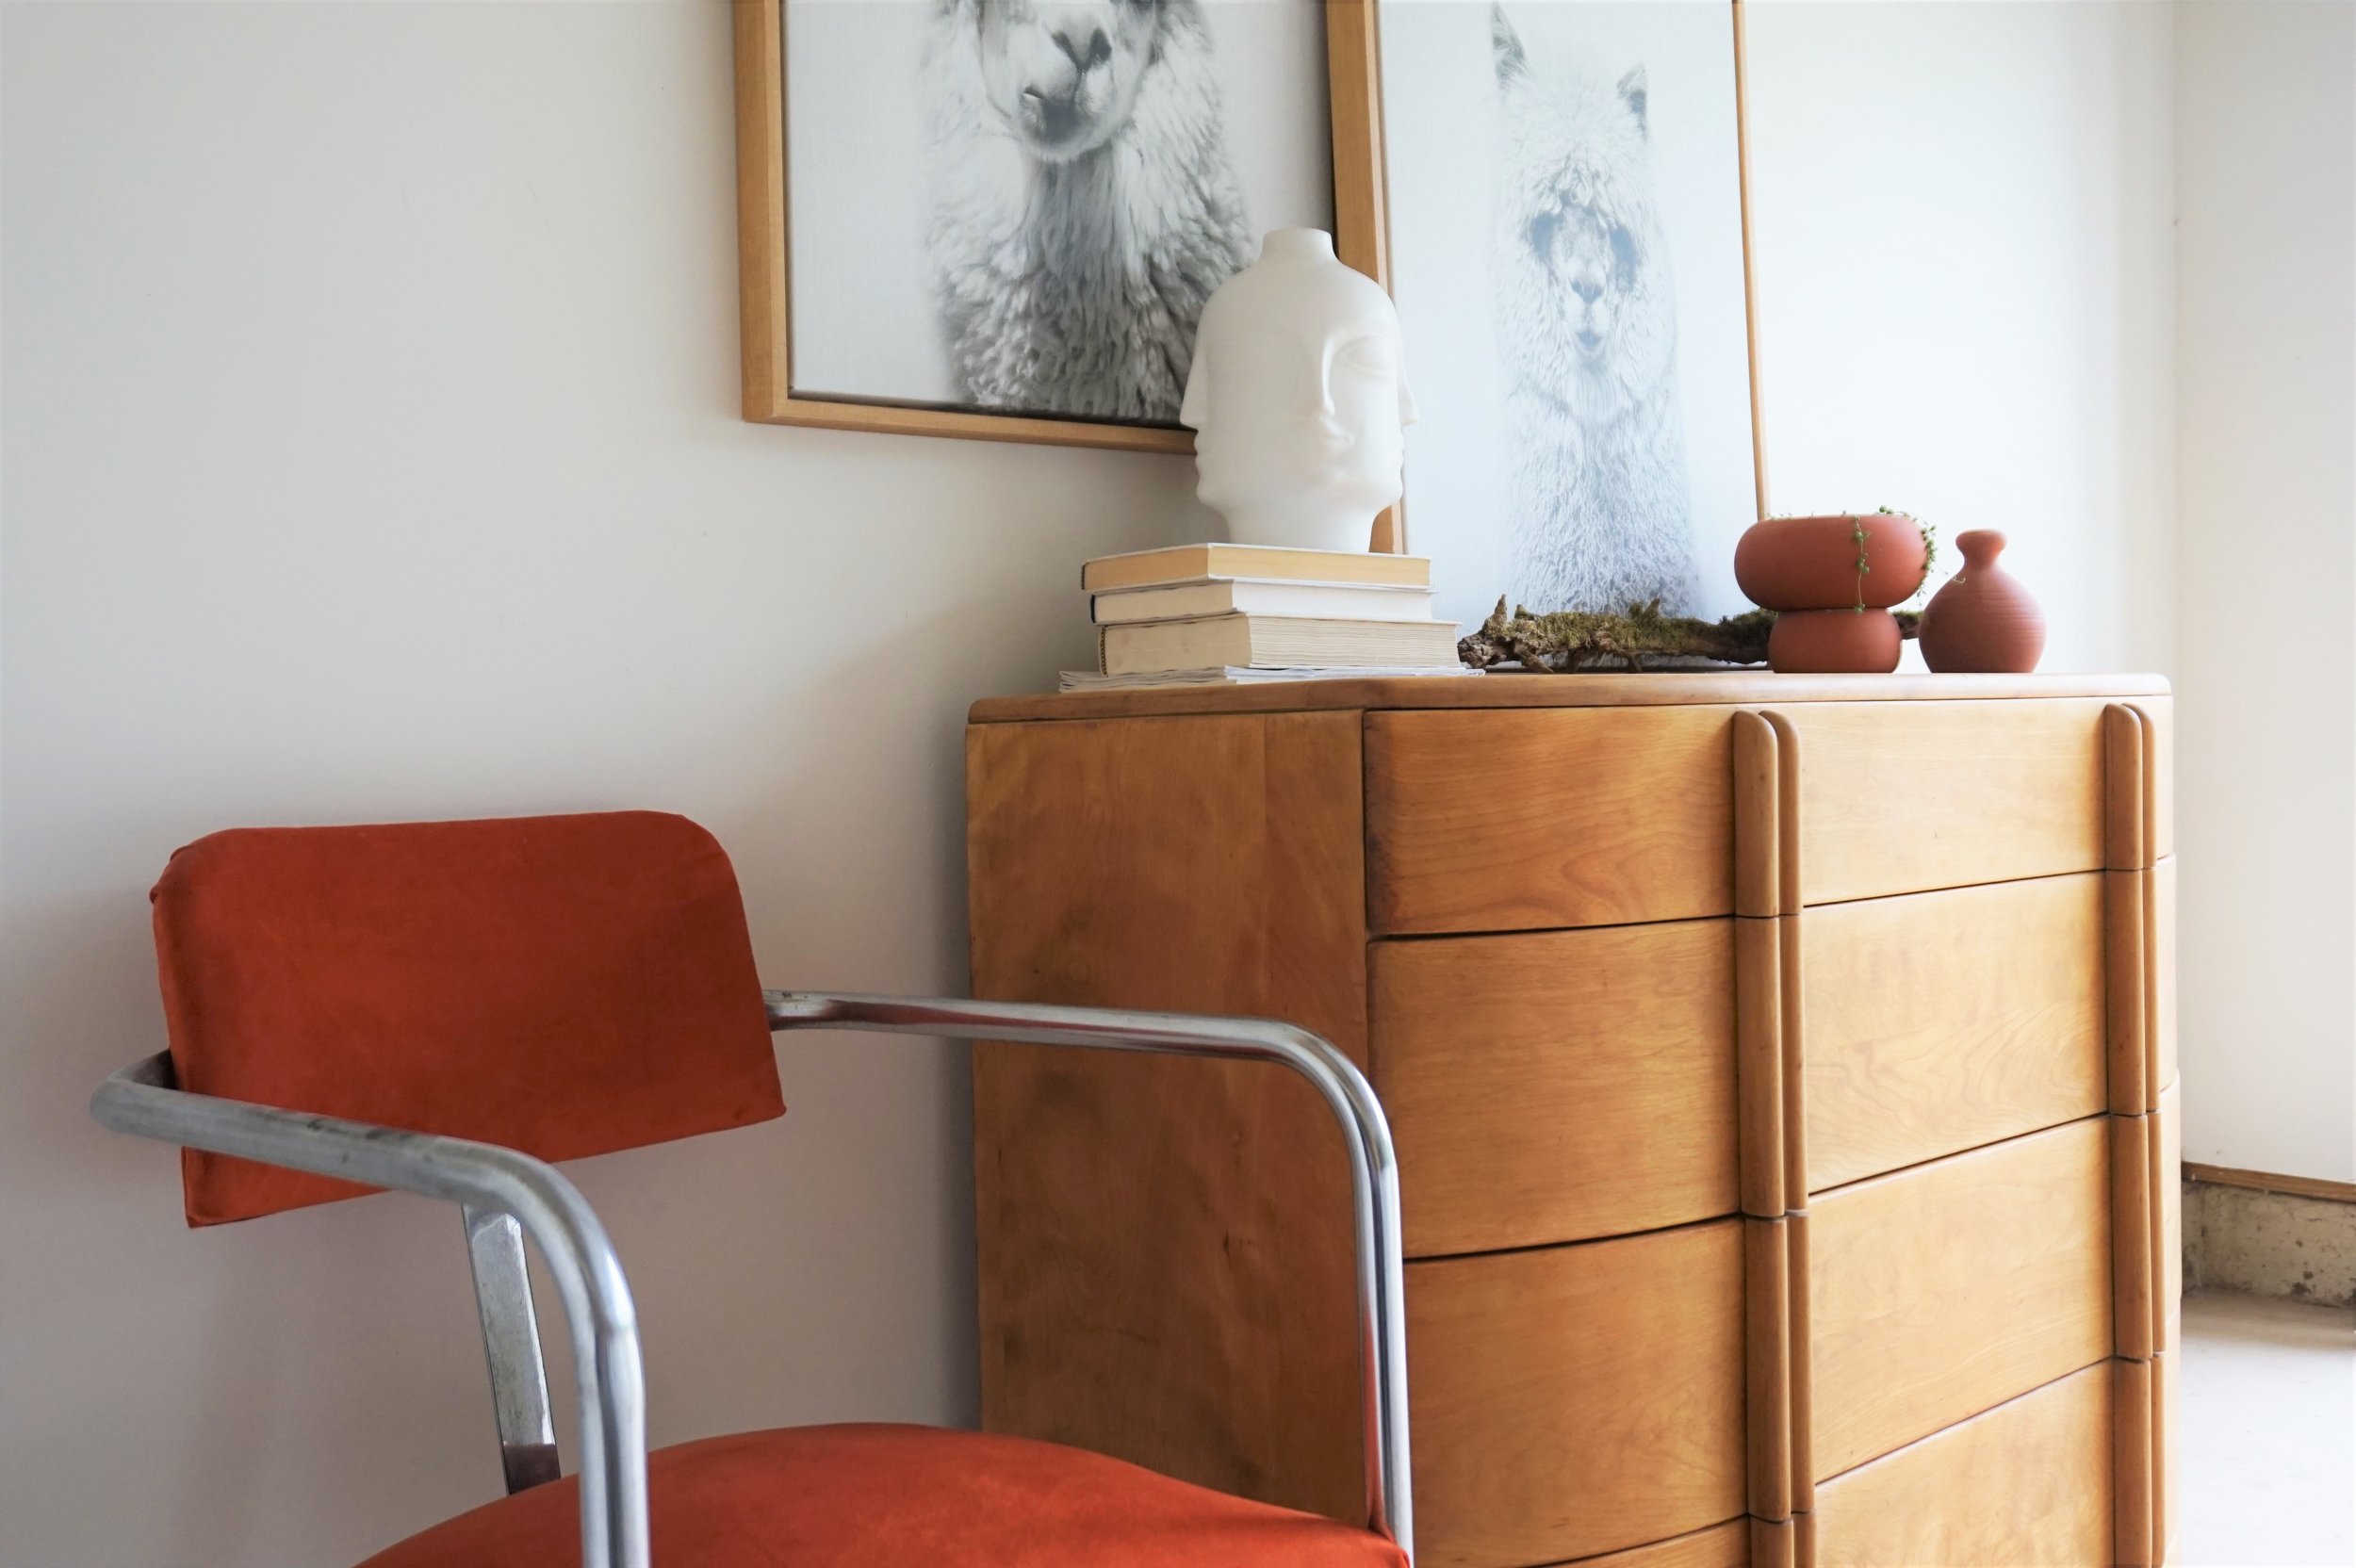
I know Heywood-Wakefields can read a little too George Jetson to some so I wanted the styling to show how it can still have its moment in the modern day. The quirky lines of this vintage dresser play well with the mod lines of my velvet cantilever chair flip and cheeky llama prints.  

IMG_0831.JPG

And I just had to pull out my face vase and add a touch or two of terracotta.

IMG_0830.JPG

This newly restored bad boy is now available for sale if you’re in the market for a piece of American-made history!  Email me for purchasing or shipping options.

FullSizeRender.jpg
 

Heywood-Wakefield Airflow Dresser
Now Available for Sale
42ʺW × 20ʺD × 34ʺH
$795

If you are interested in this piece or a custom order like it, email me at cate@stylemutthome.com

IMG_0224.JPG

Reader Design: Sarah's Urban Reno

This weekend, I'm in New York City for a friend's wedding... and that just so happens to also be the site of today's feature! Now, for many, owning your own place in New York City is an elusive pipe dream. But Sarah found a fixer upper with the right bones and embarked on a gut-job renovation to make her urban apartment a perfect fit. 

Let's take a look!

 
TGA_Entryway.JPG
 
TGA Living Room 2.JPG

From Sarah:

When I first started gathering inspiration photos for my renovation, I found myself bookmarking a mix of simpler, cleaner, more neutral spaces and ones with a bit more eclectic oomph and color to them. See, I want to be a minimalistic, neutral, Marie Kondo-esque type, but in reality, I’m much closer to a bohemian cat lady with a penchant for ALL the tchotchkes.

I balanced those two sides by keeping the bigger parts of my design (wall colors, tile, big furniture pieces) quiet so that my finishing touches (textiles, wallpaper, décor) could get loud. Cue the J. Lo and insert the dancing girl emoji here. That means my walls are a light grey, and my bathroom is all white—but I’ve got more vintage mirrors than anyone could possibly need, an antique Persian runner in my entryway, and gold Hygge & West wallpaper on the wall opposite my kitchen.
TGA Couch Exposed Brick.JPG
TGA Living Room TV Stand.JPG
The great thing about doing a gut renovation? You’re literally starting from scratch, which means your home (and your design!) can be anything you want it to be. The world is your oyster (within reason and budget, of course)! The terrible thing about doing a gut renovation? You’re spending a lot on your choices—so you better hope they’re good ones. I’m happy to say that while there are a few small things I’d do differently if I were to do it again, I’m mostly quite happy with how my little home turned out.
TGA Living and Dining.JPG
TGA Bar Cart 1.JPG

Comfort and ease were two huge considerations as Sarah was designing this space. After all, it's smack dab in the middle of the city that never sleeps, and it needs to operate accordingly!

Above all, I want my home to feel comfortable. Yes, I have nice things, but I don’t ever want anyone to feel like they can’t drink red wine on my white couch (that’s why god made eco-friendly bleach!) or like they can’t make a mess in my kitchen (lord knows I do). Homes are meant to be lived in, and I hope to evoke that sense of warmth and comfort in every aspect of my design.

The exposed brick wall, which was a happy accident during construction, goes a long way in bringing those homey vibes to the space!

TGA Breakfast Bar.JPG

In the kitchen, Sarah maximized every inch she could by adding this extra counter space with the breakfast bar and keeping things light and airy with exposed shelving and natural light. Despite how practical the design was, there is certainly no shortage of personality!

IMG_4292 (1).JPG
Cement tile is big right now (and has been for the past few years), and I put it in my kitchen. When I showed my contractor (who advised me a bit—even when I didn’t ask for it!—throughout the renovation process) the tiles I was planning on purchasing, he shook his head. “You should go for something simpler,” he said. “Something with resale value. This tile—it’s too trendy. It’ll be out in a few years.” And honestly, he may be right. In five years, I may look down at my cement tile and wish I’d done something simpler. Trends come and go, right? But since I renovated for me more than for resale value (my apartment isn’t a flip), I took a risk—and I’m glad I did. My floors make me happy every time I see them, and that feels worth it.
TGA Kitchen Stove.JPG
TGA Kitchen Shelves 2.JPG
TGA Bedroom.JPG
My bedroom is the one space where I’m not quite sure I’ve nailed it (at least, not yet)—but one piece I know I love is my dresser. I found it in the basement of my rental building about a month before I started renovations and lugged it into the elevator and up to the 10th floor one Monday night. The streets (and basements!) of New York City are a veritable treasure trove. If you keep your eyes peeled, you never know what you’ll find—for free!
TGA Bedside Table.JPG
TGA Bathtub.JPG

This whole home feels completely personalized - Sarah, we think you nailed the renovation game! Thank you for showing us around. Follow Sarah along on Instagram at @_thegrandapt for more photos and before and after details! 

McKenna Sig.jpg

Mid-Mod Dining Chairs

Not even two weeks into the summer and somehow I managed to get my hands on some Brody mid-century modern dining chairs!  Can I get a holla?!?!  Except there was only one problem...

 They looked like this:

See that splitting vinyl??  Tres tragique!  What's worse was even the underside of the chairs had instructions on how to care for the upholstery.  Someone had seriously neglected these puppies in a past life...

I motion that they add to the *DON'TS column: "Do not give to frat house or wreckless bachelor" (which is how I got my hands on them).

Since the original vinyl was so SHOT, I  had no choice but to replace the fabric.  New upholstery challenge accepted! 

As is my usual reupholstery MO, I went with a cream linen that really lightened up their silohuettes.

In a perfect world, I would've restored the original fabric.  But the seats and the backrests were truly unsalvagable.  The back panels, however, where in mint condition so after some jerry-rigging, I found a way to keep them for a two-toned contrast.

The chairs' original swivel chrome bases were in excellent shape as well. 

The backrests had some cute keyhole detailing - which I'm not gonna lie, was one of the trickiest parts of the reupholstery project.

But those wishbone keyholes, coincidentally, inspired the unconventional staging wall-art.

And (of course), I couldn't style a chair without my favorite Kilim pillow kid (shhh don't tell the others).

Is it just me or do they look like a chorus line?  

Let's practice that high kick ladies.

If you're in the D.C. Metro area and are looking for a set of dining chairs (or even some occasional or desk chairs if that's what you're in to) - hit me up.

DSC01411.jpg

Mid-Mod Dining Chairs
Now Available for Sale
$175 each/ $600 for the set

If you are interested in this set or a custom order like it, email me at cate@stylemutthome.com.