Christmas Tree Alternatives

Hi friends! Happy Thanksgiving eve! As many of you may be getting ready to get your tree over the next few weeks, I am so excited about today's topic - Christmas tree alternatives! Don't get me wrong; I love me a big ol' Douglas Fir. But, I got to thinking about all the reasons why one might not be able to swing a real tree. Many apartments don't allow you to have a real tree, (such was the case with our first apartment). Or perhaps you live on a high floor with no elevator, (you can ask our beloved Cate about that). Or maybe there is literally no space for a tree, (my sister, Casey, has all the tips and tricks to living in 150sq feet). And for many, the price of a tree is hard to justify. 

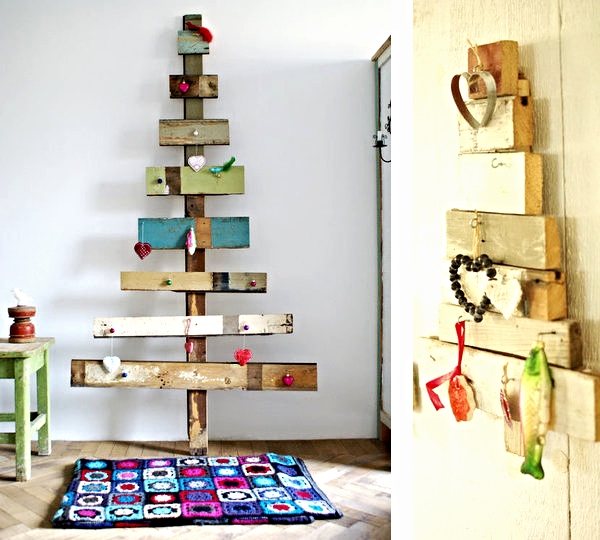
For all these reasons, and I'm sure more, you may be opting out of doing a real Christmas tree this year. Well, have I got some fun news for you! There are some seriously epic Christmas tree alternative options out there! Here are some favorites that I found:

Source: Apartment Therapy

Source: Apartment Therapy

Source: Apartment Therapy

Source: Apartment Therapy

Source: Design Milk

Source: Design Milk

Source: Design Milk

Source: Design Milk

Source unknown, feel free to tag if you do!

Source unknown, feel free to tag if you do!

Source unknown, feel free to tag if you do!

Source unknown, feel free to tag if you do!

Source unknown, feel free to tag if you do!

Source unknown, feel free to tag if you do!

Goodness, aren't these alternative trees so much fun?! Even if you're getting a real tree, any of these whimsical DIY options would make a wonderfully festive touch in another room, (oh my gosh, my kids would probably LOVE having a 'tree' in their own rooms)! If you stop by on Friday, I'll be sharing a smaller Christmas tree alternative made from magazines!

Have a wonderful Thanksgiving, friends. Cate and I are counting you in our blessings this year and we are very grateful for your encouragement of StyleMutt. Thank you, all.

~Chelsea

Paper Feather Wreath {Holiday DIY No. 2}

Mmmmmm. The weekend is here and it's already tastin' sweet, friends. If you're up for a little holiday DIY project, I've got a goodie for ya! What I love about today's DIY is that it's not screaming 'Christmas!!!' It's a piece you could easily leave out year round! But since it's a wreath, we're tossin' it into the Holiday bucket.


First things first - I absolutely cannot take credit for this project. I saw it months ago when the ever clever Melaine shared it on her My Sweet Savannah blog! The moment I saw this project I knew it would be one of the first things I made for this year's holiday season.

Let's get started! First, you need to print about 7 copies of this page on cardstock. I did this from home on FedEx online - placed my order for 8 x 11 size prints, and then picked it up, (I only used 7 sheets, but I would advise getting 10 just in case). This will cost less than $10.


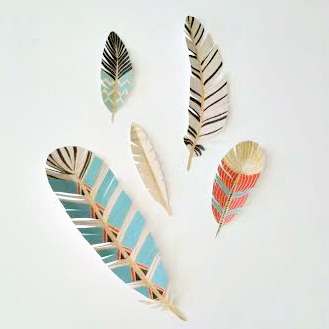
Now for the fun part! You're going to cut out each feather. After cutting the feathers from the page, you'll add small cuts to each feather to give them a bit more dimension and authenticity. 

feather wreath before2.jpg

Okay, bare with me here. This next part I did not take a picture of. As per usual, I worked on this little ditty while racing cars with one child, braiding Ana and Elsa's hair with another, and coaxing my third to keep his socks on and stop hiding them under the couch cushions...it's a beautiful kind of chaos, indeed. Back to our project! You're going to need a wreath frame at this point! Cardboard will do the trick. I just used a mixing bowl turned upside down to trace a large circle on a piece of cardboard, cut it out with a box cutter, then traced a smaller circle on the inside, and carved that one out.

Once you've got your wreath frame, just grab a glue stick and go to town! There's really no rhyme or reason to sticking your feathers on. I found it easier to start with the big blue guy first, then surrounding him with the smaller plumes, working my way around the frame one section at a time.


That's it! Not too difficult, eh?!

Rather BUY than DIY? We've got you covered.
This wreath from Anthropologie hits all the right notes of festive, elegant, and whimsical. (And if you follow the link, you'll see they staged it in one picture with white pom-pom garland, which I shared a tutorial for last week! Anthropologie and I are so in sync with each other....)

Don't forget to share your holiday decorating ideas and projects by posting your photos to our Facebook wall or tag #stylemuttholiday on Instagram!

Thank you all for stopping by and have a beautiful weekend!

This project is linked to RemodelAholic, where you can find dozens more Holiday DIYs!


Geo Painted Coasters {Holiday DIY No. 1}

Hi friends! We're sharing our first holiday DIY project for the 2014 season today! I'm gonna get confusing right away and go out of order from the list I made last week. I'm bumping the paper feather wreath, (which you're going to loooooove), to next week, and moving the geo painted coasters to today! 

We've had these wooden coasters since we got married and have used them all over our home. Since we've got a dozen of these, I thought it might be fun to scoop up four for a festive holiday upgrade. This project would make an awesome, and super inexpensive DIY gift, or the perfect little touch for your own home!

Disclaimer: My inspiration for the design on these coasters were the pointy mountains from the holiday movie, Rudolph the Red Nosed Reindeer. Remember the first scene that we see the Abominable Snowman? That's what I was going for.

I started by making an open bottom triangle of two thin strips of blue tape. I placed the tape where  I wanted my first little mountain, painted it in, then moved the tape over at varying heights to continue painting the mountain range. 

I tried one with three different colors and didn't love it quite as much, but that gives you another way of trying this simple project.

So there you have it! A super simple DIY idea that you could easily tie up and gift this season....or place around your own home!

Rather BUY than DIY? 
These trendy coasters by theCoastal on Etsy are sure to make a fun statement!

holiday coasters.jpg

We would love for you to share your own holiday decorations and projects! Just post pictures right to our Facebook page, or tag #stylemuttholiday on Instagram!

Linking to the RemodelAholic among a great round up of loads of awesome Holiday DIYs!

Thank you all for stopping by!